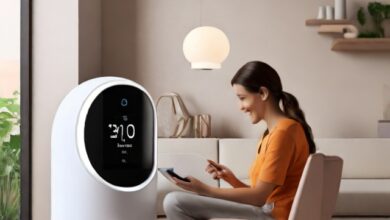
Step-by-step guide to setting up a DIY home automation system

Introduction
Home automation, once a concept of the future, has now become an accessible reality, offering unparalleled convenience and control over home environments. This article aims to guide you through the exciting journey of setting up a DIY home automation system. Whether you’re looking to control lighting, temperature, security, or all of the above, a DIY approach allows for customization and scalability while potentially saving costs. We’ll explore the basics of starting your own home automation system, from planning to execution.
Planning Your Home Automation System
The first step is thorough planning:
- Assess Your Needs: Identify which aspects of your home you wish to automate (lighting, heating, security, etc.).
- Set a Budget: Determine how much you are willing to invest in your home automation project.
- Choose the Right Protocol: Understand the differences between protocols like Wi-Fi, Zigbee, and Z-Wave, and decide which one suits your needs best.
Careful planning sets the foundation for a successful home automation system.
Selecting the Right Tools and Devices
Choosing the right tools and devices is crucial:
- Essential Tools: A smart hub is the heart of any home automation system. Additionally, you’ll need various sensors, smart lights, thermostats, cameras, etc., depending on your needs.
- Product Recommendations: Consider products that offer reliability and value for money, and check compatibility with your chosen smart hub.
Investing in the right devices ensures a smooth and efficient automation experience.
Setting Up the Central Hub
The central hub controls your entire system:
- Installation Guide: Follow a step-by-step process to set up your smart hub, including positioning and network connection.
- Hub Configuration: Customize settings according to your home layout and connected devices.
Proper setup of the central hub is critical for the seamless operation of your home automation system.
Installing Smart Devices
The next step involves installing your smart devices:
- Device Installation: Detailed instructions for installing devices like smart lights, thermostats, and cameras.
- Safety Measures: Follow safety protocols to ensure secure installation.
Correct installation of each device is key to ensuring they function as intended within your system.
Configuring and Programming Your System
Now, configure and program your system:
- Device Configuration: Set up each device through the smart hub’s interface.
- Creating Automation Rules: Learn basic programming to create rules and scenes for automated actions based on time, motion, or other triggers.
Programming your system allows for personalized automation tailored to your lifestyle.
Integrating Voice Control and Mobile Apps
Integrate your system with voice control and mobile apps:
- Voice Assistant Integration: Steps to connect your system with assistants like Amazon Alexa or Google Assistant.
- Using Mobile Apps: How to use apps for remote monitoring and control of your home automation system.
Voice and app integrations add layers of convenience and accessibility to your system.
Testing and Troubleshooting
Once set up, it’s time to test and troubleshoot:
- System Testing: Methods to test the functionality of your automated system.
- Troubleshooting Tips: Solutions for common issues that might arise during or after setup.
Testing ensures your system operates as expected, and troubleshooting knowledge is essential for maintenance.
Expanding Your Home Automation System
Explore ways to expand your system:
- Adding Devices: Ideas for incorporating more devices and functionalities.
- Staying Updated: Keep your system current with the latest technology and updates.
Expanding your system allows it to evolve with your changing needs and the latest tech advancements.
Conclusion
Setting up a DIY home automation system can be an enriching experience that brings convenience and efficiency to your daily life. By following these steps, you can create a system that not only meets your current needs but is also adaptable for future enhancements. Embrace the process and enjoy the journey towards a smarter home.
FAQ:
Q1: What is the first step in creating a DIY home automation system?
A1: The first step is planning. Assess your specific home automation needs, set a budget, and choose the right technology protocol (like Wi-Fi, Zigbee, or Z-Wave) that suits your requirements.
Q2: What are the most common devices used in home automation?
A2: Common devices include smart hubs, smart lights, thermostats, cameras, motion sensors, and smart locks. These devices provide control over lighting, temperature, security, and more.
Q3: Do I need technical skills to set up a DIY home automation system?
A3: Basic technical skills are helpful, but many modern home automation devices are designed for easy installation and user-friendly configuration. Most systems come with detailed guides and customer support.
Q4: How important is choosing the right smart hub?
A4: Very important. The smart hub is the central control point for your home automation system. It should be compatible with your chosen devices and protocols and offer the functionalities you need.
Q5: Can I integrate voice assistants like Alexa or Google Assistant into my system?
A5: Yes, many home automation systems can be integrated with voice assistants, allowing for hands-free control and enhanced convenience.
Q6: What are the security risks of home automation systems, and how can I mitigate them?
A6: Security risks include hacking and unauthorized access. Mitigate these risks by using strong, unique passwords, enabling two-factor authentication, and regularly updating software and firmware.
Q7: How can I troubleshoot issues with my home automation system?
A7: Common troubleshooting steps include checking device connections, restarting your router or hub, and consulting the user manual or online support forums. For complex issues, contact customer support.


